Hyundai Elantra (CN7): Crash Pad / Crash Pad Garnish
Components and components location
| Components Location |
| [This illustration shows the LHD type. RHD type is symmetrical.] |
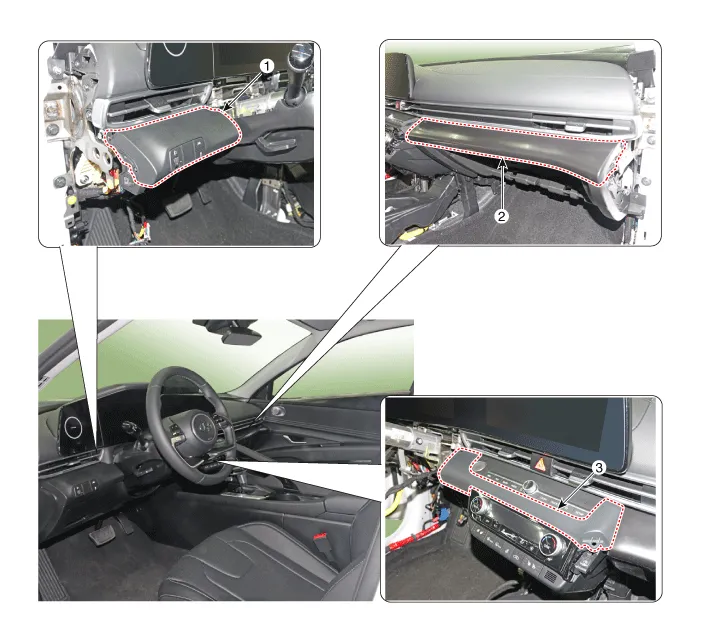
| 1. Crash pad garnish [LH] 3. Crash pad garnish [CTR] | 2. Crash pad garnish [RH] |
Repair procedures
| Replacement |
|

|

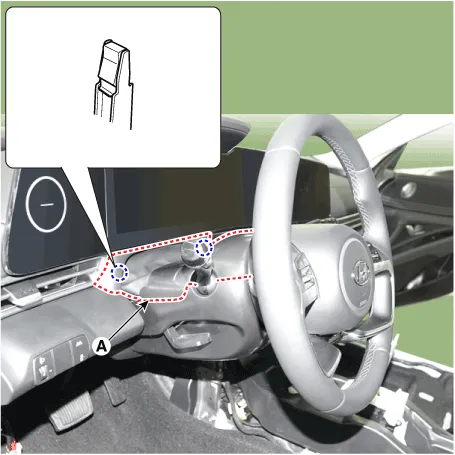
| 1. | Detach the clips, then remove the front door body side weatherstrip (A). [LH]
[RH]
|


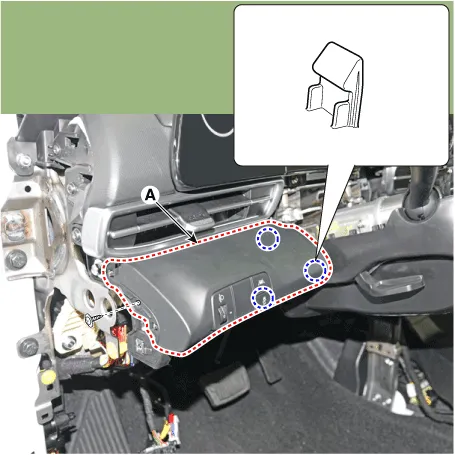
| 2. | Using a screwdriver or remover, remove the crash pad side cover (A). [LH]
[RH]
|


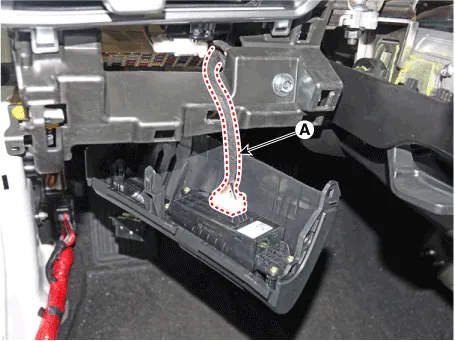
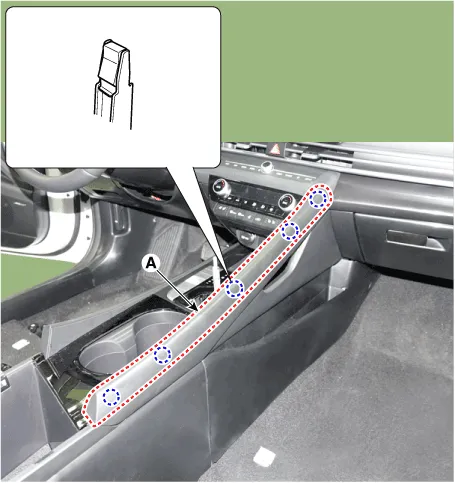
| 3. | Remove the crash pad garnish [LH]
[RH]
[CTR]
|
| 4. | Install in the reverse order of removal.
|

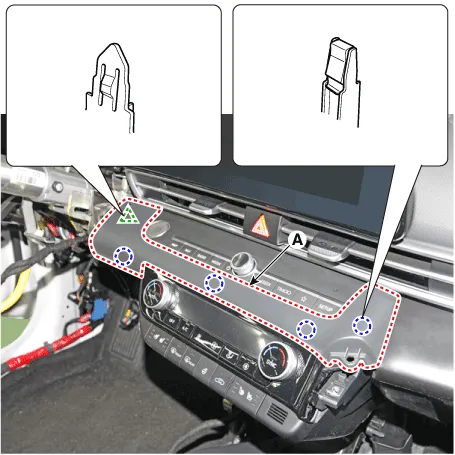
Components and components location Components Location[This illustration shows the LHD type. RHD type is symmetrical.]1. Center fascia panel Repair procedures Replacement • When removing with a flat - tip screwdriver or remover, wrap protective tape around the tools to prevent damage to components.
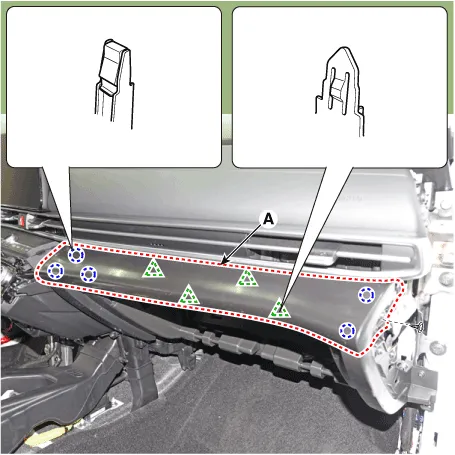
Components and components location Component Location [This illustration shows the LHD type. RHD type is symmetrical.]1. Crash pad lower panel Repair procedures Replacement • When removing with a flat - tip screwdriver or remover, wrap protective tape around the tools to prevent damage to components.
Other information:
Hyundai Elantra (CN7) 2021-2026 Service Manual: Condenser
Components and components location Components Location[General type]1. Condenser[N Line]1. Condenser Repair procedures Inspection1.Check the condenser fins for clogging and damage. If clogged, clean them with water, and blow them with compressed air.
Hyundai Elantra (CN7) 2021-2026 Service Manual: Description and operation
DescriptionRear Corner Radar is a system that measures the relative speed and distance from the following vehicles by using two electromagnetic wave radar sensors attached to the rear bumper, and detects any vehicle within the blind spot zone and gives off alarm.
Categories
- Manuals Home
- Hyundai Elantra Owners Manual
- Hyundai Elantra Service Manual
- Drive Mode
- Front Radar Unit
- Integrated Thermal Management Module (ITM)
- New on site
- Most important about car
